|
Listen to article
Getting your Trinity Audio player ready...
|
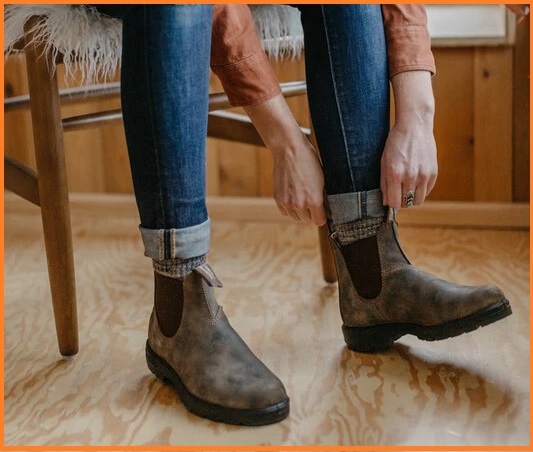
Hey there boot fans! So, you just got yourself a shiny new pair of Blundstones – an awesome choice! Now, I know they might feel a bit stiff right out of the box and you are tensed about how to break in Blundstones to make it comfortable. But fear not, because I have got your back on turning those boots into clouds for your feet.
In this guide, today I am going to walk you through the all-in-one, sharing all the tricks to make your Blundstones feel like they were custom-made for your feet. No more awkward stiffness – just pure, unadulterated comfort. So, kick back, lace up, and let’s go into the art of breaking in your Blundstones! Get ready for some serious foot happiness!
In Short: Break in your Blundstones effortlessly by walking in them, adjusting their temperature, and filling them with damp newspaper or towels. Smooth the process with alcohol, wax, or mink oil, and enhance comfort by giving them a gentle stretch with mechanical tools. If walking proves challenging, protect your feet with heel cups, gel pads, or plasters. These easy steps will have your Blundstones feeling comfortable and snug in no time.
Contents
- 1 How to break in Blundstones
- 2 FAQs
- 3 Conclusion
How to break in Blundstones
Breaking into the wonderful world of Blundstone boots might hit a speed bump with their initial toughness, potentially leading to discomfort and blisters. How to break in Blundstones, its quick fix involves employing shoe stretchers. By gently stretching your Blundstones over a few days, you can fast-track the break-in process, making them outdoor-ready and blister-resistant.
But wait, there’s more! We’ve got a few other effortless tricks up our sleeve to ensure you slide into that blissful comfort zone with your Blundstone boots without a hitch. Here’s how I tackled it:

Wear Them Around the House
I started by wearing them around the house for short spells. Just getting used to the feel without committing to a long trek. I advised trying to wear them around the house for 15-20 minutes initially. Allowed the leather to start adjusting to my foot shape without overwhelming them.
Slowly Increase in Wear Time
Day by day, I upped the time I spent in them. Didn’t want to rush things, you know? Gradual seemed to be the key. I advised trying to gradually increase wear time by 10-15 minutes each day. Helped both my feet and the boots ease into the extended wearing periods without causing discomfort.
Use Thick Socks
Thick socks became my best friends. They provide additional padding, reducing friction and minimizing the risk of blisters. Plus, they add a layer of comfort to the process.
Adjust Lacing
Messed around with different lacing styles. I experiment with different lacing techniques to find the most comfortable fit. Adjust the tightness in specific areas, ensuring that the boots aren’t too loose or too tight. This step is crucial for finding that sweet spot.
Apply Leather Conditioner
Applied a bit of leather conditioner. Not only did it speed up the breaking-in, but it also kept those boots looking sharp. Regular conditioning maintains the boots’ longevity and appearance.
Flex and Bend Ritual
Every so often, I’d give the boots a good flex and bend. Softening up that leather, making it more ‘me.’ You can do this while wearing the boots or when they’re off – whichever feels more comfortable.
Consider Temperature Methods
Heard about the hairdryer trick. Gave it a shot – warmed them up a bit before wearing them. Seemed to help the leather loosen up. Alternatively, you can experiment with the freezer method by placing a bag of water inside the boots overnight.
Use Protective Inserts
If a spot felt cranky, I threw in some gel pads or moleskin. Comfort over everything, right? This is particularly useful if you’re dealing with pressure points or specific areas that need extra cushioning.
Waiting Game
Be patient throughout the breaking-in process. Rushing it may lead to unnecessary discomfort or even damage to the boots. Letting the boots and my feet do their thing over time paid off.
Professional Stretching
In the end, if things got too tricky, a visit to the professional cobbler did wonders. They have the expertise to stretch specific areas without compromising the overall integrity of your beloved Blundstones.
So, that’s my Blundstones breaking-in saga. Remember, breaking in your Blundstones is a unique experience for everyone. Pay attention to how your feet and the boots respond, and customize these steps to suit your comfort needs. Before you know it, you’ll have a pair of Blundstones that feel like they were made just for you!

What causes blisters when wearing Blundstones?
Ever wonder why those awesome Blundstones are giving you blisters? Well, a few things could be at play:
1. Fresh Leather Vibes: When your Blundstones are fresh out of the box, the leather can be a bit stiff. It’s like they need some time to get to know your feet and vice versa. Until they cozy up, there might be some friction causing those pesky blisters.
2. Size Matters: No, seriously. If your boots are too snug or too roomy, you’re setting the stage for some serious rubbing and blister action. Double-check you’ve got the right size for your precious feet.
3. Sock Game Weak: Your choice of socks can make or break the blister situation. Thin or ill-fitting socks? Not the move. Opt for socks that offer some cushioning and snugly fit your feet.
4. Pressure Points Drama: Certain parts of the boots, like seams or design quirks, might be playing rough with your feet. Identifying these sore spots and addressing them during the breaking-in phase can save you from blister hell.
5. Break-In Timeout: If you’re not giving your Blundstones enough break-in time, they might be holding onto that initial stiffness. Slow and steady wins the race here.
6. Weather Woes: Extreme weather can also be a factor. Wet boots might become more pliable, but they can also turn into friction machines. Make sure your boots get some dry time.
To prevent blisters while breaking in your Blundstones, consider the following tips:
- Take it Slow: Gradually increase the time you spend in your boots. Let the leather and your feet get comfortable with each other.
- Sock Upgrade: Invest in socks that love your feet back. Moisture-wicking and padded ones are the MVPs.
- Blister Shields: Consider using moleskin or blister prevention patches on potential hotspots before slipping into your boots.
- Pressure Point Check: Figure out if any part of the boots is playing the villain. Adjustments or a cobbler’s touch might be the hero you need.
- Size Check: Double-check that your boots are the right size. No compromises here.
By giving your Blundstones the farewell they deserve and considering these tips, you’ll be strutting comfortably in no time, blister-free!

FAQs
1. How long does it typically take to break in Blundstones?
The break-in period varies for each person, but it usually takes a couple of weeks of regular wear to achieve optimal comfort. Be patient, and let the boots adjust to your feet gradually.
2. Can I use stretching sprays or oils to quicken the break-in?
Some people find success with leather stretching sprays or oils, but be cautious and follow the product instructions. Overuse may affect the leather’s quality, so moderation is key.
3. What if my Blundstones still feel uncomfortable after the break-in period?
If discomfort persists, consider revisiting the sizing, inspecting for pressure points, or seeking advice from a cobbler. They can provide professional insights and adjustments for a better fit.
Conclusion
So there you have it—a step-by-step guide on how to break in Blundstones. The journey to comfort is unique for each pair and each pair of feet, but fear not—I have compiled a comprehensive guide to make the process smoother. With a bit of time, attention, and the right techniques, your Blundstones will transform into a pair of boots that offer not only durability and style but also unparalleled comfort tailored just for you. Happy walking!

